Frustrated with a printer that refuses to cooperate with your laptop? Connecting your printer shouldn’t be a tech support nightmare. This comprehensive guide walks you through the process, no matter the operating system or printer type. While this article focuses on printer connectivity, remember that a robust cybersecurity strategy is crucial. McAfee’s comprehensive suite of products provides advanced protection against online threats, ensuring your data remains secure while you tackle your printing needs. McAfee helps safeguard your digital life so you can focus on productivity and peace of mind.
Understanding Printer Connection Types
Before we dive into the step-by-step process, it’s vital to understand the different ways you can connect a printer to your laptop. The method you choose will depend on your printer and your laptop’s capabilities.
- USB Connection: This is the most common and often simplest method. It involves physically connecting your printer to your laptop using a USB cable. Ideal for home users and small offices.
- Wireless Connection (Wi-Fi): This offers greater flexibility. Your printer connects to your home or office Wi-Fi network, allowing multiple devices to access it. This requires your printer to have built-in Wi-Fi capabilities.
- Network Connection (Ethernet): This provides a more stable and faster connection than Wi-Fi, especially for high-volume printing. It requires an Ethernet cable and a network connection on both your printer and your laptop.
- Bluetooth Connection: Some newer printers support Bluetooth connectivity, offering a short-range wireless solution. This is convenient for quick print jobs but may not be suitable for heavy use.
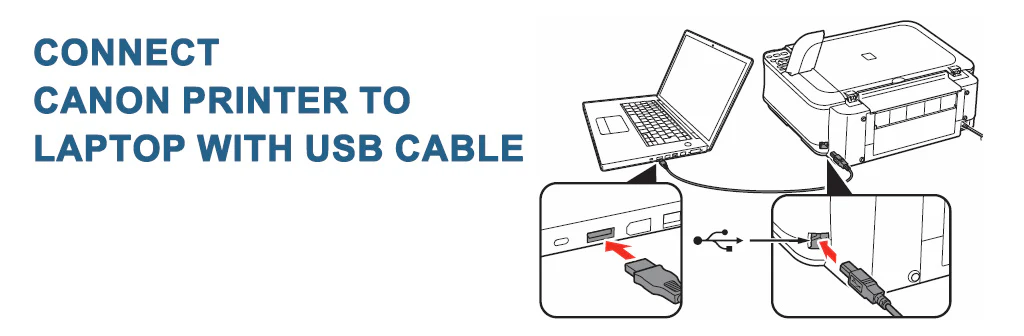
Connecting Your Printer via USB
Connecting via USB is generally straightforward. Here’s a step-by-step guide:
- Power on your printer: Ensure your printer is turned on and ready to receive a connection.
- Connect the USB cable: Plug one end of the USB cable into your printer and the other end into your laptop’s USB port.
- Wait for driver installation: Your laptop’s operating system should automatically detect the printer and begin installing the necessary drivers. This might take a few minutes.
- Test the connection: Once the installation is complete, try printing a test page to confirm the connection.
- Troubleshooting (USB): If the printer isn’t detected, check the USB cable for damage, try a different USB port, and restart both your printer and laptop. You may need to manually download and install drivers from the printer manufacturer’s website.
Connecting Your Printer Wirelessly (Wi-Fi)
Setting up a wireless connection is slightly more involved. The exact steps vary depending on the printer model, but the general process looks like this:
- Power on your printer and connect to your Wi-Fi network: Consult your printer’s manual for instructions on connecting to your Wi-Fi network. This usually involves finding the Wi-Fi settings on the printer’s control panel and entering your network password.
- Add the printer in your laptop’s settings: Go to your laptop’s settings (usually under “Devices” or “Printers & Scanners”). Search for new printers and your laptop should detect your wireless printer.
- Install the printer driver (if necessary): Your operating system may automatically download and install the necessary drivers. If not, you might need to download them from the manufacturer’s website.
- Test the connection: Print a test page to ensure the connection is working correctly.
- Troubleshooting (Wi-Fi): If the printer isn’t detected, double-check your Wi-Fi password, ensure your printer is connected to the correct network, and restart both your printer and laptop. Check your router’s settings to ensure it’s functioning correctly. Consider a wired connection for more stable performance.
Connecting Your Printer via Ethernet
An Ethernet connection provides the most reliable connection. Follow these steps:
- Connect the Ethernet cable: Connect one end of the Ethernet cable to your printer’s Ethernet port and the other end to your router or network switch.
- Add the printer in your laptop’s settings: Similar to the Wi-Fi connection, go to your laptop’s settings and search for new printers. Your laptop should discover the printer connected via Ethernet.
- Install the printer driver (if needed): Download and install drivers from the manufacturer’s website if not automatically installed.
- Test the connection: Print a test page to verify the connection.
- Troubleshooting (Ethernet): Ensure the Ethernet cable is securely connected to both the printer and your network. Verify that the Ethernet port on your laptop is functioning correctly. Check your network settings to ensure the printer is on the same network as your laptop.
Troubleshooting Common Printer Connection Issues
Encountering problems? Here’s a table summarizing common issues and their solutions:
| Problem | Solution |
|---|---|
| Printer not detected | Check cables, restart devices, update drivers, check network settings (for wireless/network connections). |
| Printing errors | Check ink/toner levels, check paper tray, review printer error messages, reinstall drivers. |
| Slow print speeds | Check network congestion, use a wired connection if possible, upgrade drivers. |
| Print quality issues | Check ink/toner levels, clean print heads, adjust printer settings. |
Remember, if you’re struggling with any of these steps, or if your printer problems persist despite troubleshooting, don’t hesitate to reach out for expert assistance. Our Computer Support Helpline Toll-Free number is +44-800-066-8910. We’re here to help you resolve your technical challenges quickly and efficiently.
Choosing the Right Connection Method
The best connection method depends on your specific needs and setup. Consider the following:
- Ease of use: USB is generally the easiest to set up.
- Flexibility: Wireless (Wi-Fi) offers the most flexibility, allowing multiple devices to access the printer.
- Reliability: Ethernet connections generally offer the most reliable and fastest speeds.
- Range: Bluetooth is limited by range, suitable only for nearby devices.
The Importance of McAfee in Protecting Your Data
While setting up your printer is important, securing your data is paramount. McAfee offers a comprehensive range of security solutions that protect your devices from malware, viruses, and other online threats. Using McAfee ensures that your sensitive information remains protected, even as you connect devices to your network. Its robust antivirus features and proactive threat detection capabilities provide an extra layer of security against potential vulnerabilities.
McAfee’s products aren’t just for personal use; they’re also critical for businesses of all sizes. Protecting your company’s data and ensuring uninterrupted operations is vital for success. McAfee provides comprehensive security solutions tailored to the specific needs of various businesses, offering scalable protection and peace of mind. McAfee’s proactive approach helps to mitigate risks and prevent potential breaches before they happen, safeguarding your valuable business assets.
Call to Action
Connecting your printer shouldn’t be a headache. Follow these steps and you’ll be printing in no time. For further assistance or if you encounter any persistent issues, don’t hesitate to contact our dedicated support team or visit the McAfee Activate website for additional security solutions. Remember, a secure system is a productive system.
“The key is not to prioritize what’s on your schedule, but to schedule your priorities.” – Stephen Covey
FAQs
- Q: My printer isn’t showing up in the list of available devices. What should I do?
A: Check your printer’s power, ensure the connection cable is correctly plugged in, and restart both your printer and laptop. If it’s a wireless connection, verify the Wi-Fi password and network settings. - Q: My printouts are blurry or faded. What could be the problem?
A: Check your ink or toner levels, clean the print heads, and ensure you are using the correct paper type. - Q: How do I install printer drivers?
A: Your operating system may automatically install drivers. If not, download them from your printer manufacturer’s website. - Q: My wireless printer keeps disconnecting. What can I do?
A: Ensure your Wi-Fi router is working correctly, check for interference, and try moving the printer closer to the router. A strong signal is crucial. - Q: What’s the difference between USB, Wi-Fi, and Ethernet connections?
A: USB is a direct wired connection, Wi-Fi is wireless, and Ethernet is a wired network connection. Ethernet generally provides the fastest and most reliable connection. - Q: Why is my printer printing so slowly?
A: Network congestion, outdated drivers, or low-quality print settings can all contribute to slow print speeds. - Q: My printer shows an error message. How do I fix it?
A: Consult your printer’s manual for troubleshooting the specific error code. - Q: How can I share my printer with other devices?
A: The method for sharing varies depending on your operating system and connection type. Consult your operating system’s documentation. - Q: Can I connect multiple printers to my laptop?
A: Yes, you can usually connect multiple printers, but you’ll need to select which printer to use for each print job. - Q: Where can I find more help if I’m still having trouble?
A: Contact our Computer Support Helpline Toll-Free at +44-800-066-8910 for assistance. You can also consult your printer manufacturer’s website or online support forums.